
-p-2000.png)


How to Add Custom CSS and JavaScript Code in Webflow

As a Webflow design and development agency, we know how Webflow has undeniably revolutionized the website development industry with a remarkable designing tool. This tool is a visual platform that allows developers to create and manage responsive websites without having to write any code.
However, this does not preclude the possibility of writing code to add extra functionality to the website if desired.
Keep scrolling to find out more about Webflow custom code and how you can add it to your Webflow website.
What is Custom Code in Webflow?
So, firstly, what is Webflow custom code? In simple terms, custom code refers to any modification or element that is not originally supported by Webflow.
Sounds tricky, right?
To be fair, it can be a little challenging. Because custom codes are advanced modifications, there are chances that they possibly conflict with Webflow’s core functionality.
Keeping these facts in mind about custom code, Webflow only supports three types of codes:
- CSS
- JavaScript
- HTML
While adding Webflow custom code, another important thing that you might want to keep in mind is the limitations on the number of characters allowed:
- Embedded elements are limited to 10,000 characters
- Single-page codes are also limited to 10,000 characters
- Codes for the entire website are limited to 20,000 characters
With that, let us find out how you can add custom code to your whole website.
How to Add Custom Code to the Whole Site in Webflow
When adding to your entire website, custom codes can be used in both the head and footer sections. Let’s first take a look into how you can add custom code to your site’s Head section.
- First, go to 'Site Setting'.

- Second, click on ‘Custom Code’ tab.
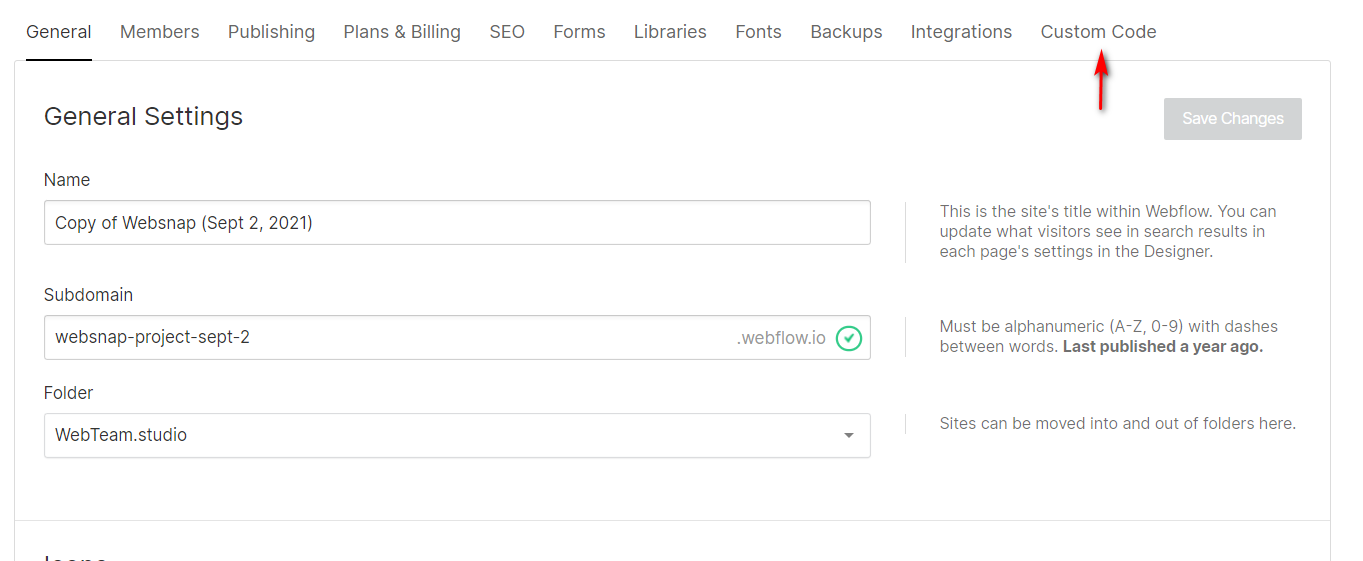
- Third, you can now go ahead and add your custom code in the ‘Head Code’ section.
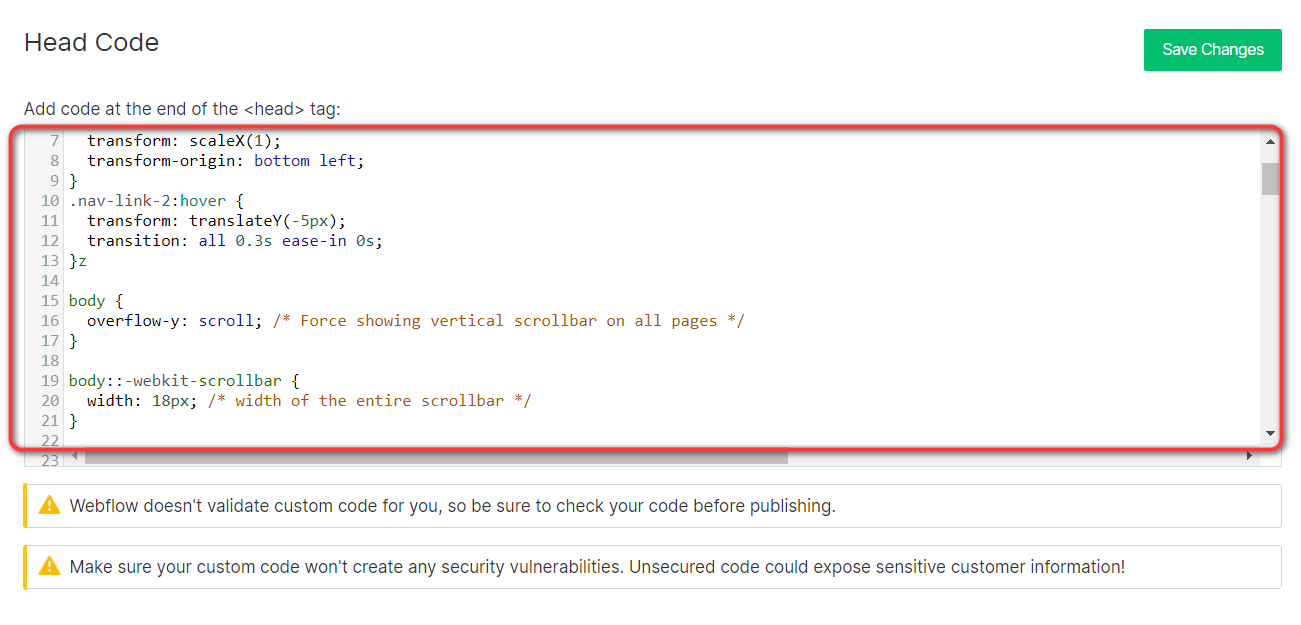
- Lastly, remember to click on ‘Save Changes’.
Custom code added in the ‘Head Code’ section will show up on your website’s HTML markup before the closing tag </head> and will apply to the whole site. You can add metadata, link external resources, and use custom styles in the Head code section.
Now, let’s find out how you can add custom code to your website’s Footer section.
For this, you will again need to go to the ‘Site Setting’ > ’Custom Code’ tab.
- Then, simply enter your custom code in the ‘Footer Code’ section.
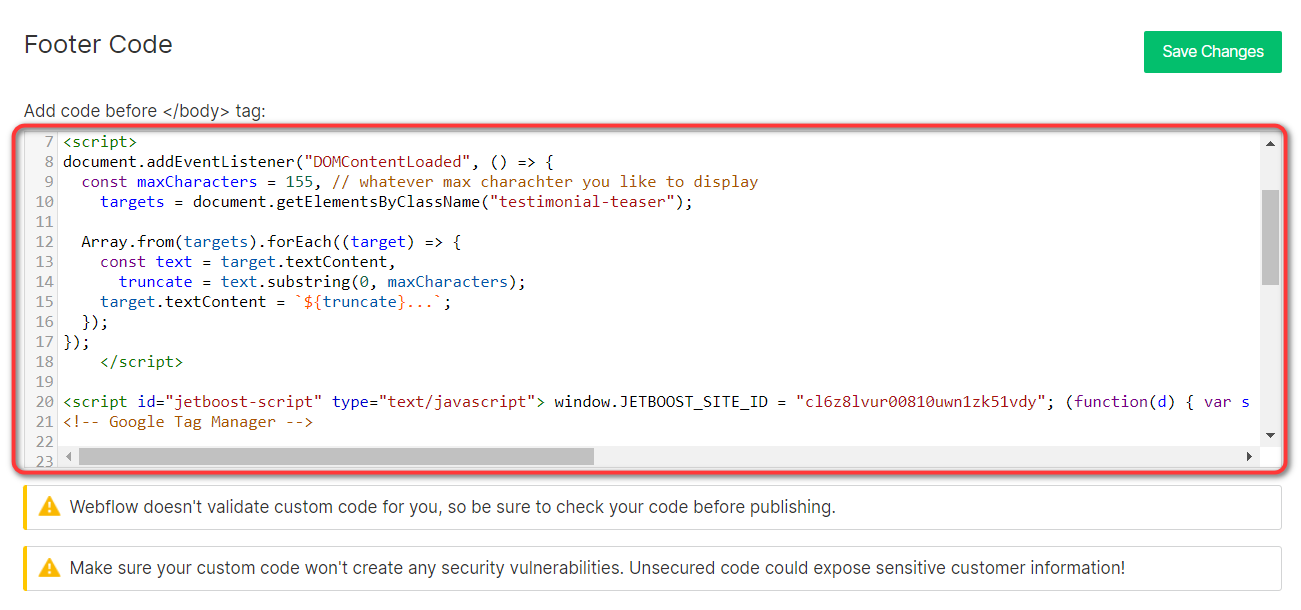
- And, of course, click on ‘Save Changes’.
When you add a custom code in the ‘Footer Code’ section, it will show up on your website’s HTML markup before the closing tag </body> and will apply to the whole site.
How to Add Custom Code to a Single Page in Webflow
So, what if you don’t want your custom code for the entire site but want to add it only to one or a few pages instead?
But before we tell you how, always remember to put the tags <meta>, <link>, and <style></style> within the <head> tag. You can also add <script></script> tags before the closing tag </body> to improve your site’s functionality and help improve your website’s visitor experience.
Now, if you wish to add a custom code to a particular page inside the <head> tag, all you have to do is go through the following steps.
- Firstly, you will have to open your website in the ‘Designer’ mode.
- Then, click on ‘Page Settings’ for the page you wish to customize.
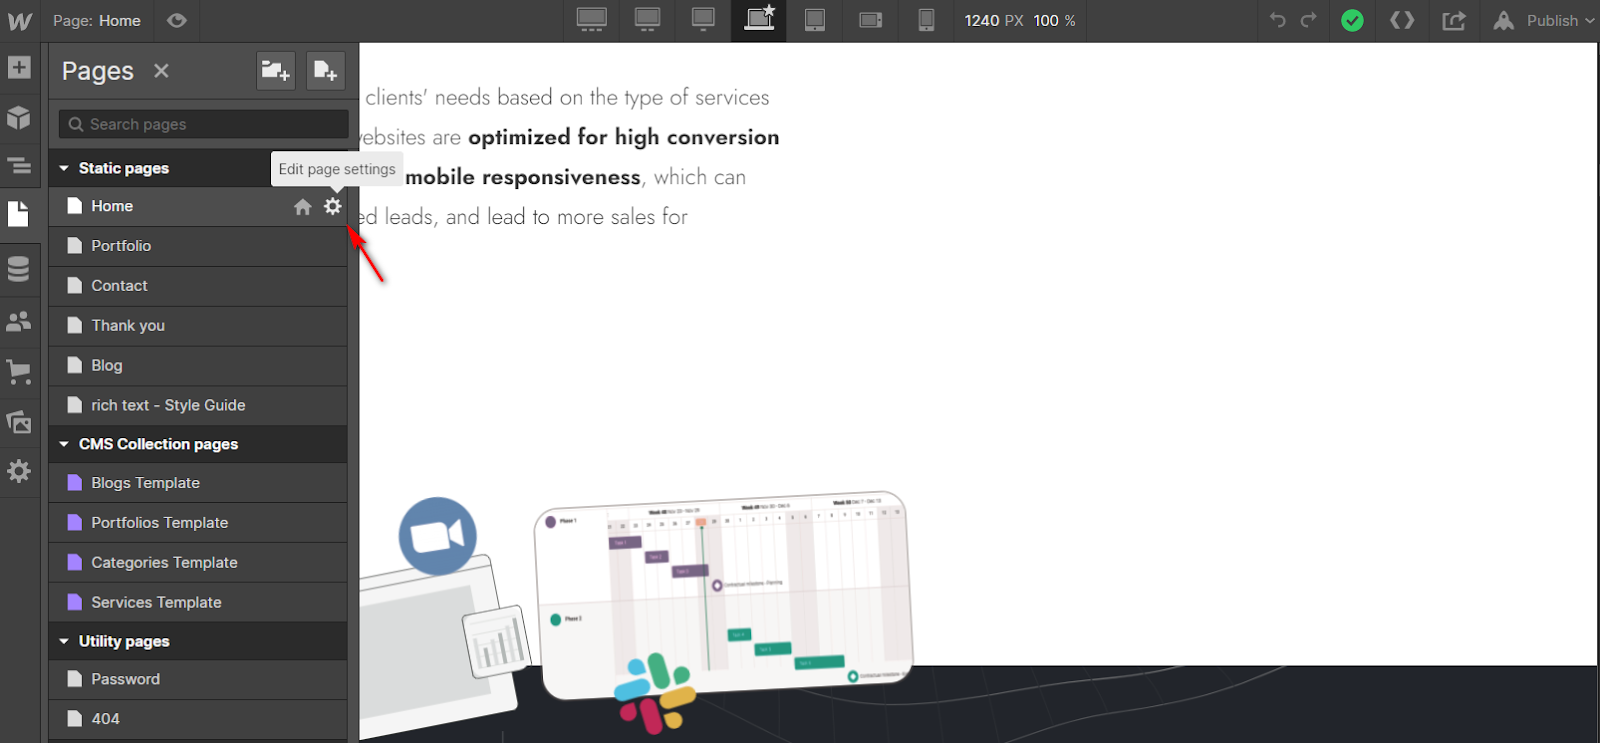
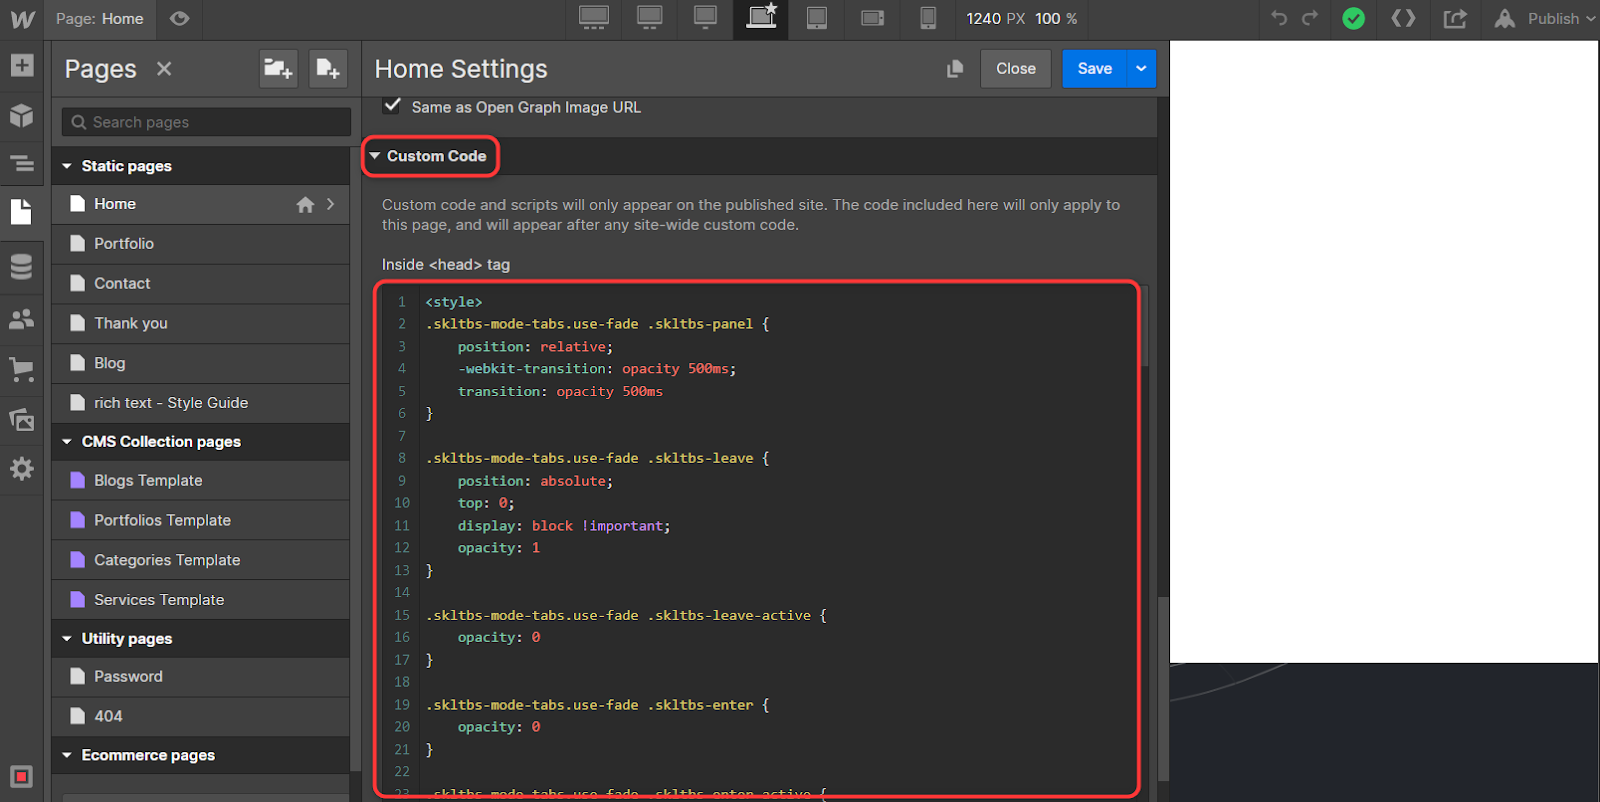
- Go ahead and add your code to the section named ‘Inside <head> tag’ located under ‘Custom Code’.
- Click on ‘Save’.
Next, if you wish to add custom code before the </body> tag, follow these steps:
- Open the site using ‘Designer’ mode.
- Go to ‘Page Settings’ of the page to be customized.
- Head over to the ‘Before </body> tag’ section located under ‘Custom Code’.
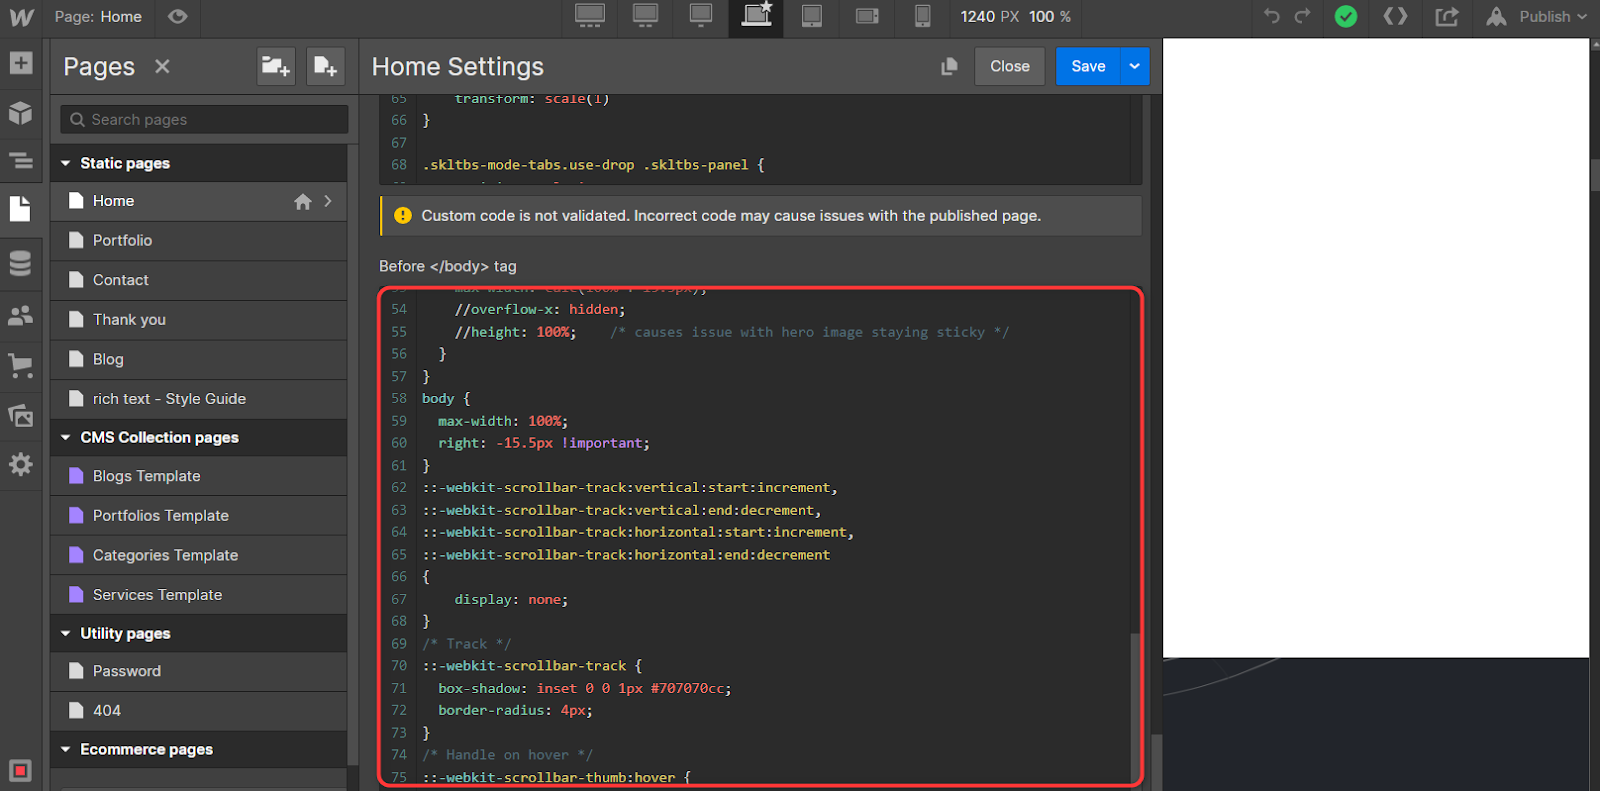
- Add your code.
- Click on ‘Save’ and voila!
Also Read: How to Convert Figma Designs to Webflow
Web Designing Made Easy With Webflow
Customizing your website with Webflow custom CSS and Webflow JavaScript can be a great way to improve the look and feel of your website. Simply follow the steps mentioned in this blog, and you can easily transform your site into a custom and unique design that will help you stand out from the competition.

Our Webflow experts can help.
Contact usOur Webflow experts can help.
Contact usFAQ

Editorial Team
Publisher

Editorial Team
Publisher
Subscribe to Seattle New Media Newsletter

Enter your details to get instant access
Get the File Now
If you'd like to download the file, enter your name and email below, and we'll send it directly to your inbox.
The file has been sent to your email. Please check your inbox!
As a Webflow design and development agency, we know how Webflow has undeniably revolutionized the website development industry with a remarkable designing tool. This tool is a visual platform that allows developers to create and manage responsive websites without having to write any code.
However, this does not preclude the possibility of writing code to add extra functionality to the website if desired.
Keep scrolling to find out more about Webflow custom code and how you can add it to your Webflow website.
What is Custom Code in Webflow?
So, firstly, what is Webflow custom code? In simple terms, custom code refers to any modification or element that is not originally supported by Webflow.
Sounds tricky, right?
To be fair, it can be a little challenging. Because custom codes are advanced modifications, there are chances that they possibly conflict with Webflow’s core functionality.
Keeping these facts in mind about custom code, Webflow only supports three types of codes:
- CSS
- JavaScript
- HTML
While adding Webflow custom code, another important thing that you might want to keep in mind is the limitations on the number of characters allowed:
- Embedded elements are limited to 10,000 characters
- Single-page codes are also limited to 10,000 characters
- Codes for the entire website are limited to 20,000 characters
With that, let us find out how you can add custom code to your whole website.
How to Add Custom Code to the Whole Site in Webflow
When adding to your entire website, custom codes can be used in both the head and footer sections. Let’s first take a look into how you can add custom code to your site’s Head section.
- First, go to 'Site Setting'.
- Second, click on ‘Custom Code’ tab.
- Third, you can now go ahead and add your custom code in the ‘Head Code’ section.
- Lastly, remember to click on ‘Save Changes’.
Custom code added in the ‘Head Code’ section will show up on your website’s HTML markup before the closing tag </head> and will apply to the whole site. You can add metadata, link external resources, and use custom styles in the Head code section.
Now, let’s find out how you can add custom code to your website’s Footer section.
For this, you will again need to go to the ‘Site Setting’ > ’Custom Code’ tab.
- Then, simply enter your custom code in the ‘Footer Code’ section.
- And, of course, click on ‘Save Changes’.
When you add a custom code in the ‘Footer Code’ section, it will show up on your website’s HTML markup before the closing tag </body> and will apply to the whole site.
How to Add Custom Code to a Single Page in Webflow
So, what if you don’t want your custom code for the entire site but want to add it only to one or a few pages instead?
But before we tell you how, always remember to put the tags <meta>, <link>, and <style></style> within the <head> tag. You can also add <script></script> tags before the closing tag </body> to improve your site’s functionality and help improve your website’s visitor experience.
Now, if you wish to add a custom code to a particular page inside the <head> tag, all you have to do is go through the following steps.
- Firstly, you will have to open your website in the ‘Designer’ mode.
- Then, click on ‘Page Settings’ for the page you wish to customize.
- Go ahead and add your code to the section named ‘Inside <head> tag’ located under ‘Custom Code’.
- Click on ‘Save’.
Next, if you wish to add custom code before the </body> tag, follow these steps:
- Open the site using ‘Designer’ mode.
- Go to ‘Page Settings’ of the page to be customized.
- Head over to the ‘Before </body> tag’ section located under ‘Custom Code’.
- Add your code.
- Click on ‘Save’ and voila!
Also Read: How to Convert Figma Designs to Webflow
Web Designing Made Easy With Webflow
Customizing your website with Webflow custom CSS and Webflow JavaScript can be a great way to improve the look and feel of your website. Simply follow the steps mentioned in this blog, and you can easily transform your site into a custom and unique design that will help you stand out from the competition.
Our Webflow experts can help.
Button TextFAQ
Editorial Team
Publisher
Subscribe to Seattle New Media Newsletter
Editorial Team
Publisher
Get the File Now
If you'd like to download the file, enter your name and email below, and we'll send it directly to your inbox.
The file has been sent to your email. Please check your inbox!


.jpg)


Hi, I'm Mike!
If you are enjoying the article, feel free to subscribe to our monthly newsletter.
If you have any project requirements, please contact us.


